Quick guide
Parameters
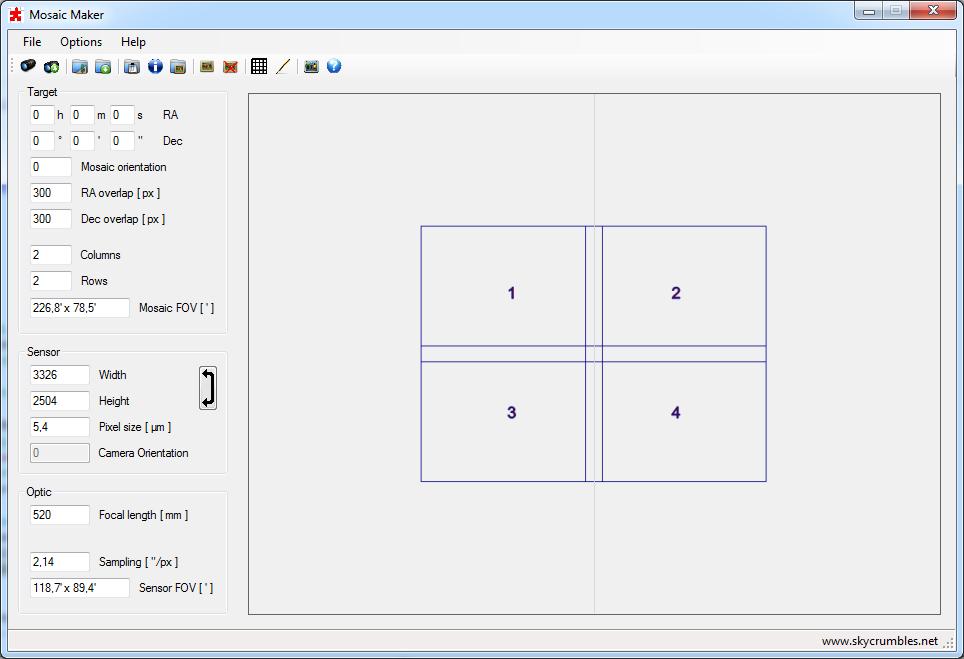
At the first execution you have to fill in the information of your setup, camera and scope.
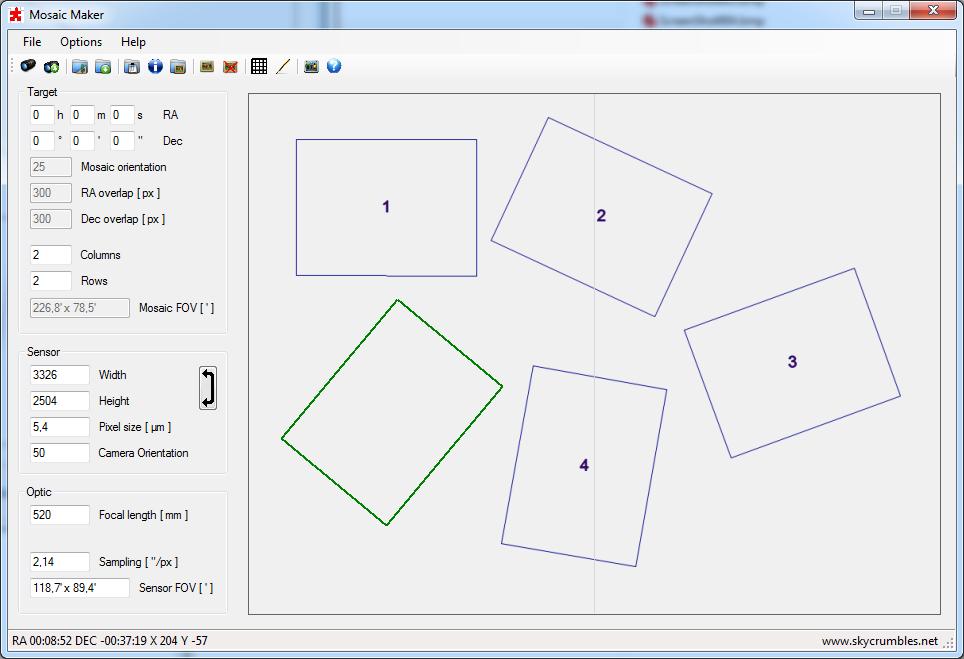
The program has no background image loaded and you should see four frames on the right area.
Moving the mouse over the graphic area you’ll see a green rectangle, which represent the FOV of the
mosaic, and in the status bar at bottom left of main window the coordinates of mouse position.
Target
NOTE: Target is the center of the graphic area and the center of the image.
Exporting the list of the frames in Free disposition Target is still the center of the image but
in Grid mode the mosaic center may be different from the image center.
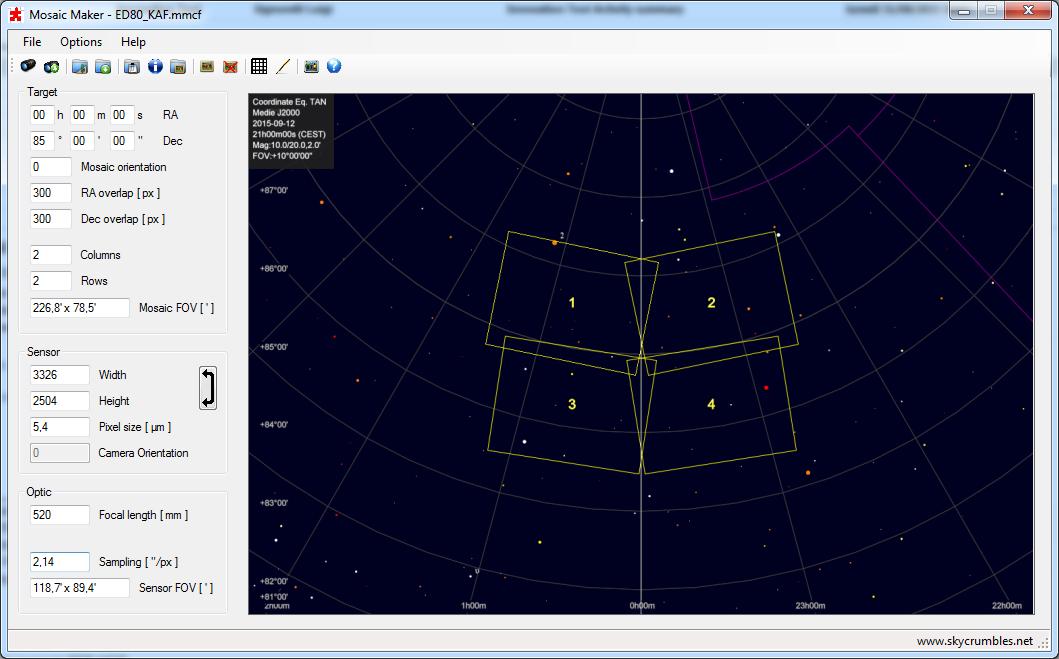
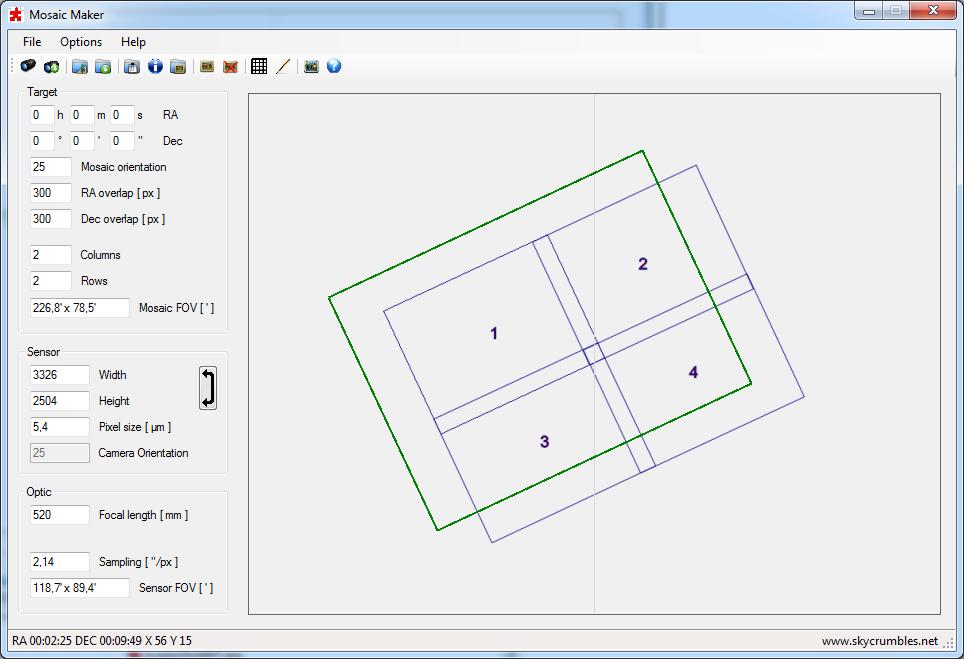
As the declination get closer to the poles you’ll notice that FOV preview swivels. That’s because the program assumes the telescope is in equatorial mode, north is up and
the graphic area represents a bidimensional projection of a tridimensional model. Just for a test set Mosaic orientation to zero, target center around 85 degrees and
move the mouse in the graphic area; you’ll notice that the FOV always points to the pole.
Mosaic orientation can be written directly in the field or changed using the mouse wheel. The standard step is 5 degrees but pressing CRTL key it changes to 1 degree per step.
RA and Dec overlap should be set to grant enough star presence when aligning the images.
Typically a 10% of sensor size is enough but be sure that frames overlap sufficiently to avoid ‘holes’ in the mosaic.
Rows and Columns determine the size of the mosaic.
In Free disposition mode some parameters of Target are disabled, Camera
orientation is enabled and the FOV preview gets the size of the sensor.
In this mode you can add an arbitrary number of frames, each of them with its own orientation. Left click on the graph to add one,
right click to remove the last. To increase or decrease the graphic area, change either Rows or Columns
and the graphic will be updated.
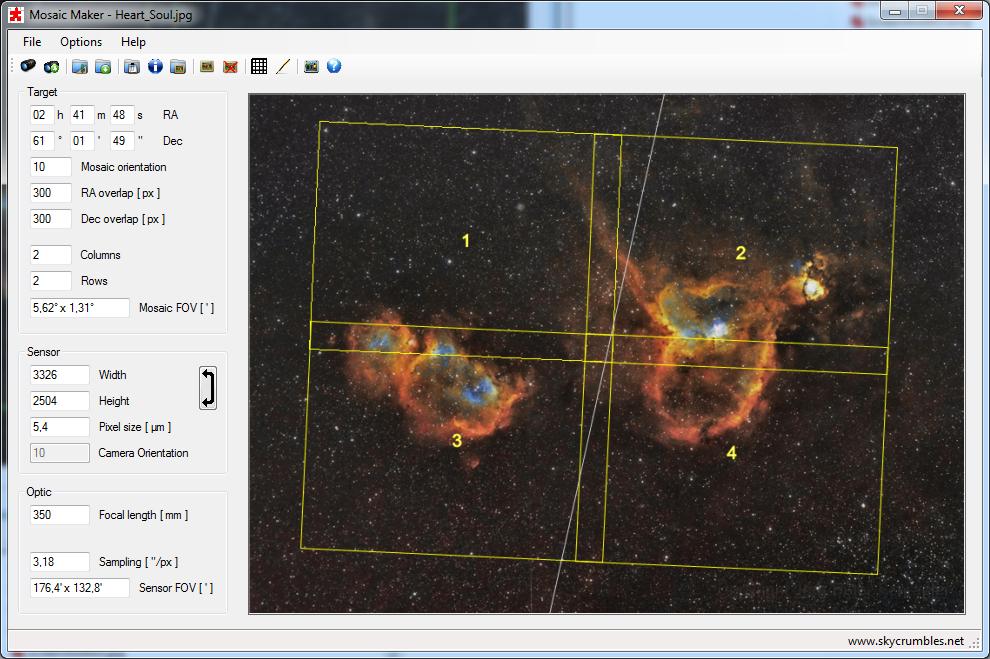
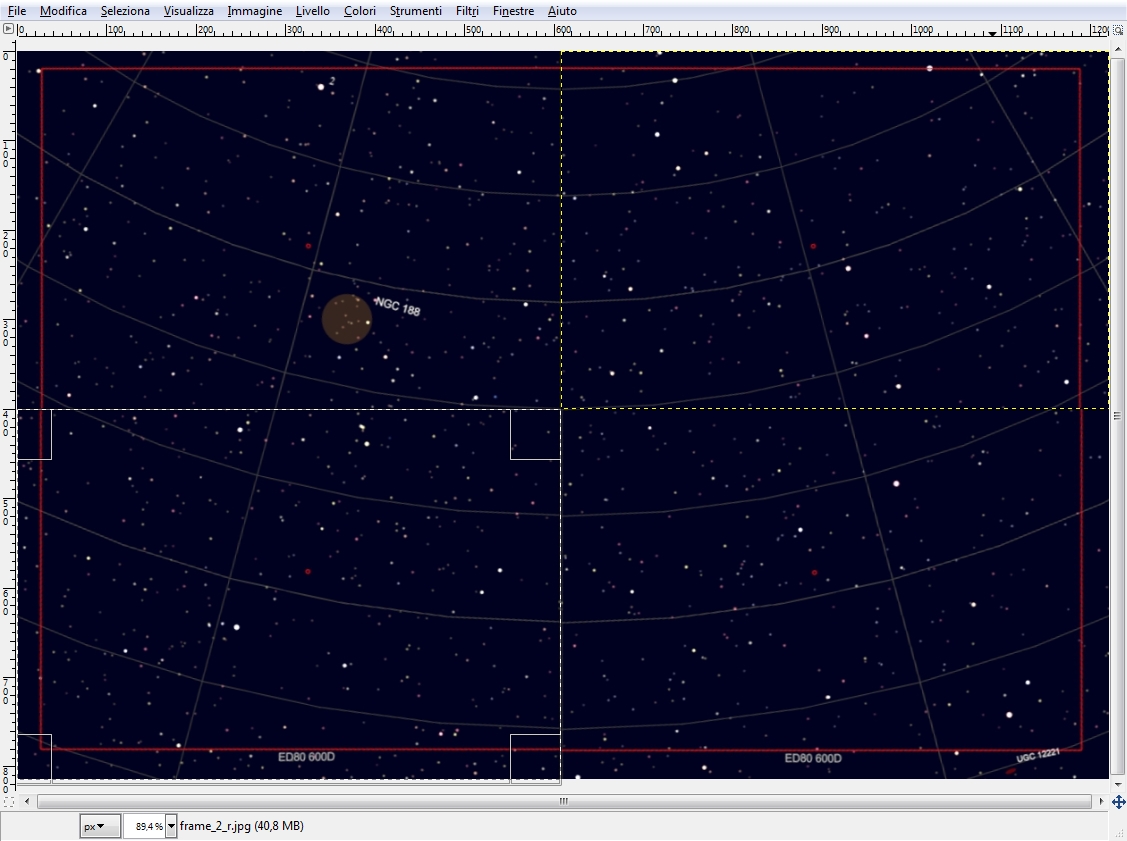
Background image
Loading a background image gives a better understanding of the final result. If you have a wide field image of the area you want to take,
load the image, plate solve it (or if you know the data, fill in the form) and the result can be quickly available… ok the preview of it.
By moving the FOV preview and rotating it you can easily have an idea of the final result.
Same if you want to cover an irregular shape e.g. to merge hi resolution small areas of a wider picture.
Switch to Free disposition mode and place the frames you need.

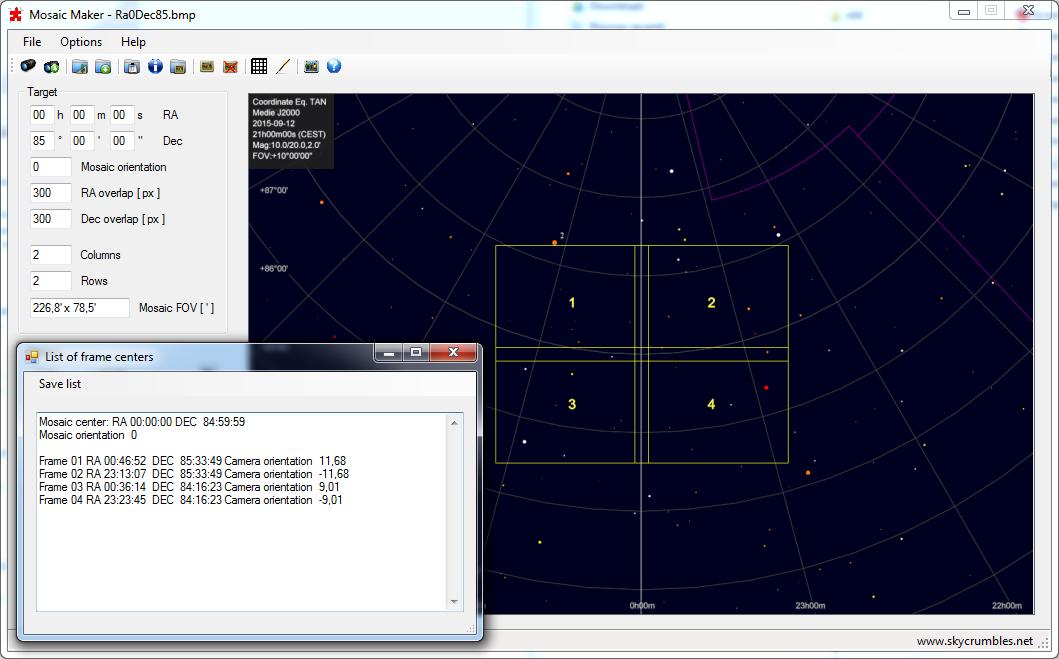
Exporting centers list
The list of centers is available from menu File, Export centers list and can be copied to clipboard or saved to file.
In Free disposition, the list is quite clear… frame number, coordinates and
rotation, but in Grid mode things are a little bit different: mosaic center coordinates, mosaic orientation
and the list of frame centers followed by Camera orientation. What’s that?
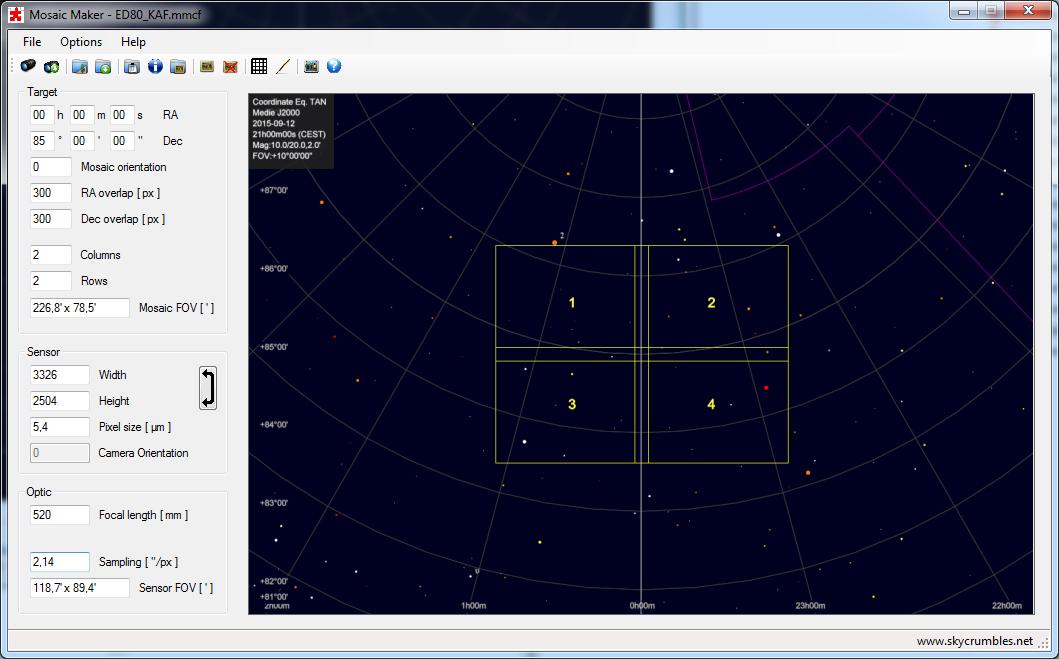
Let’s select the option Use camera rotator and consider mosaic orientation set to zero for better understanding.
We want to take a mosaic 2×2 centered on RA 0h, 0m, 0s and Dec 85° 0′ 0″
The program shows a nice rectangle of four frames and gives back the list of centers, but what happens when I move the mouse over the first?
The FOV is rotated respect to the underlying frame of mosaic. That’s because the RA of the frame center is different from mosaic center RA.
Camera orientation is the angle I’ve to rotate the camera for each frame of the list, so that once registered they give back a rectangular mosaic.
Try to deselect the option Use camera rotator and see what happens.
If you don’t want (or you simply can’t) rotate the camera for each frame, be sure that frames overlapping is enough to prevent uncovered areas in the final mosaic.
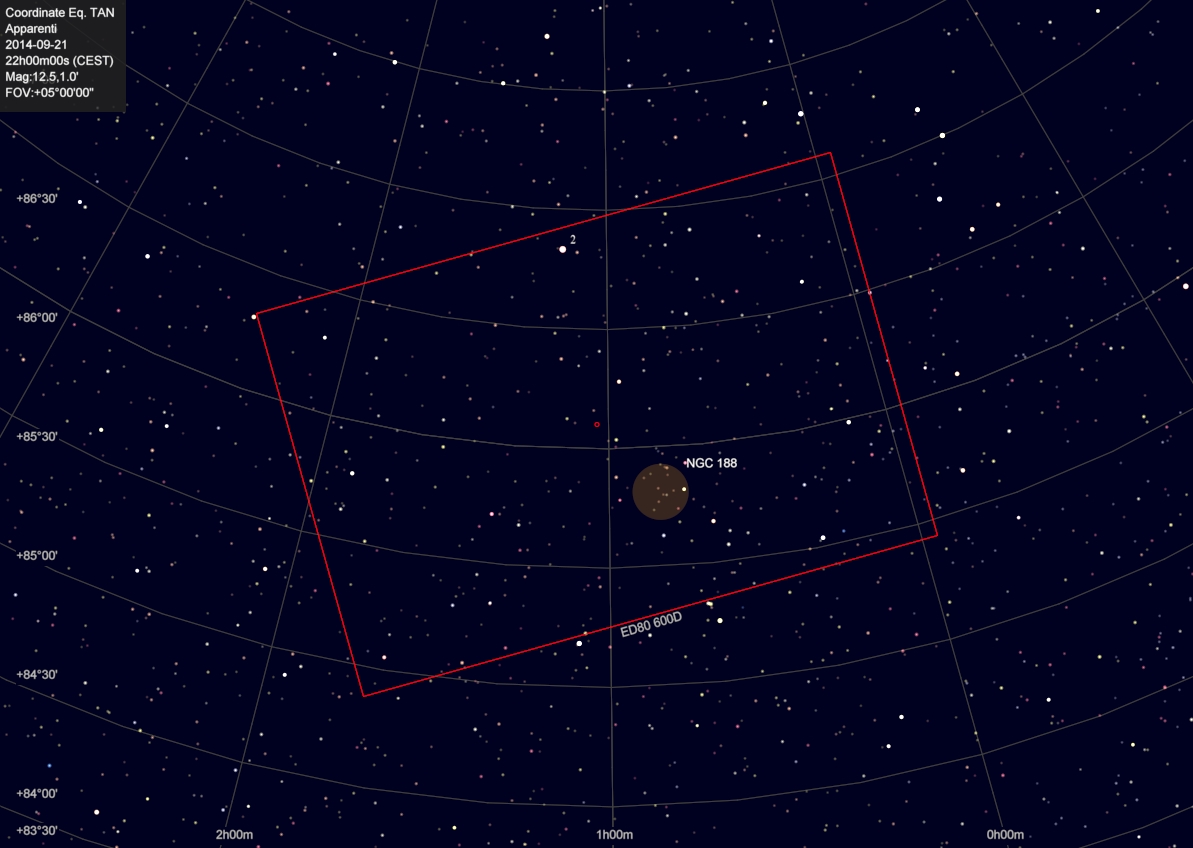
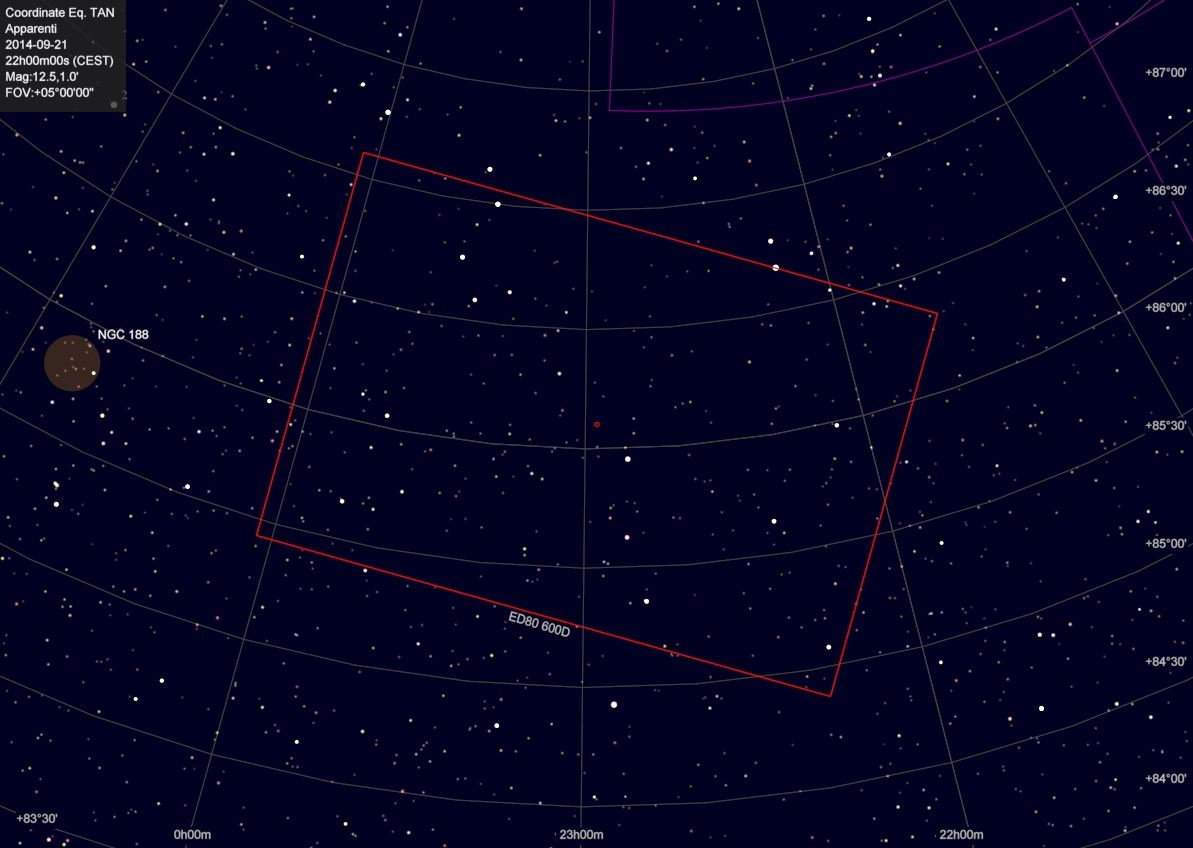
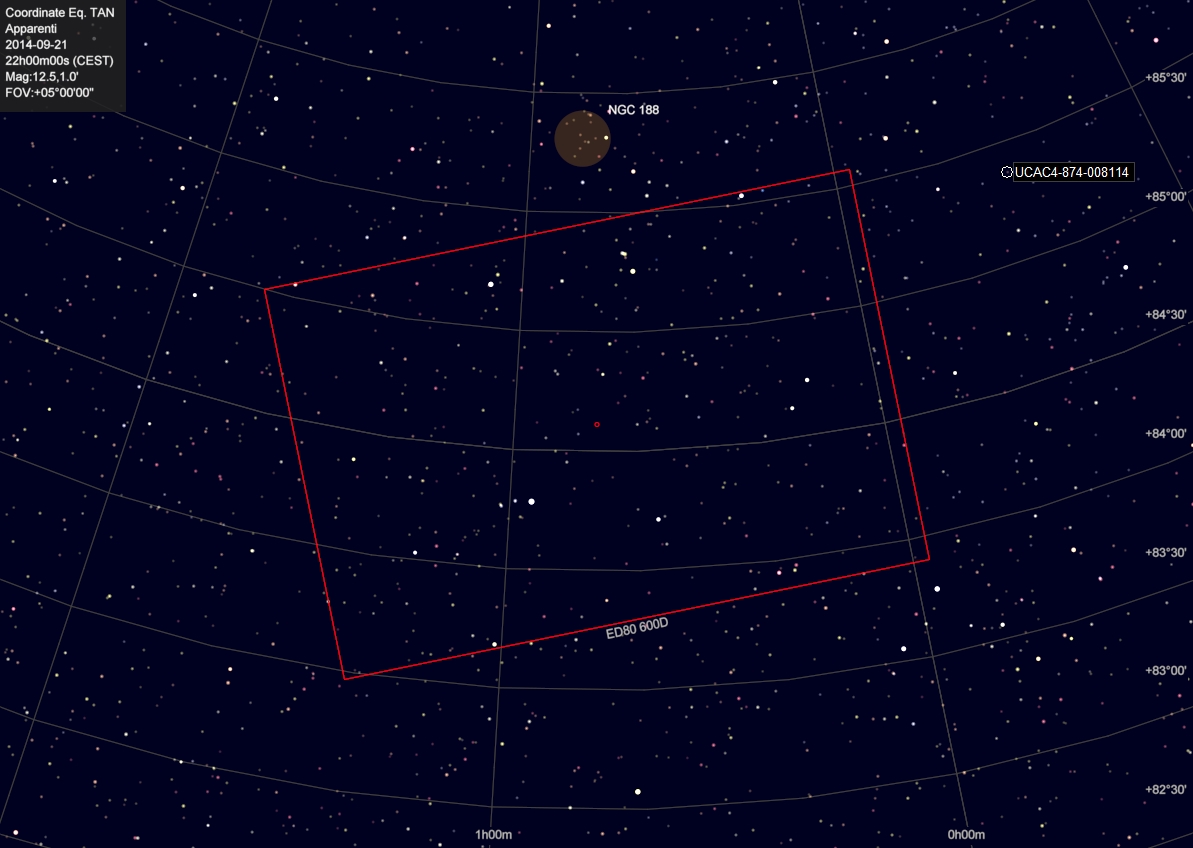
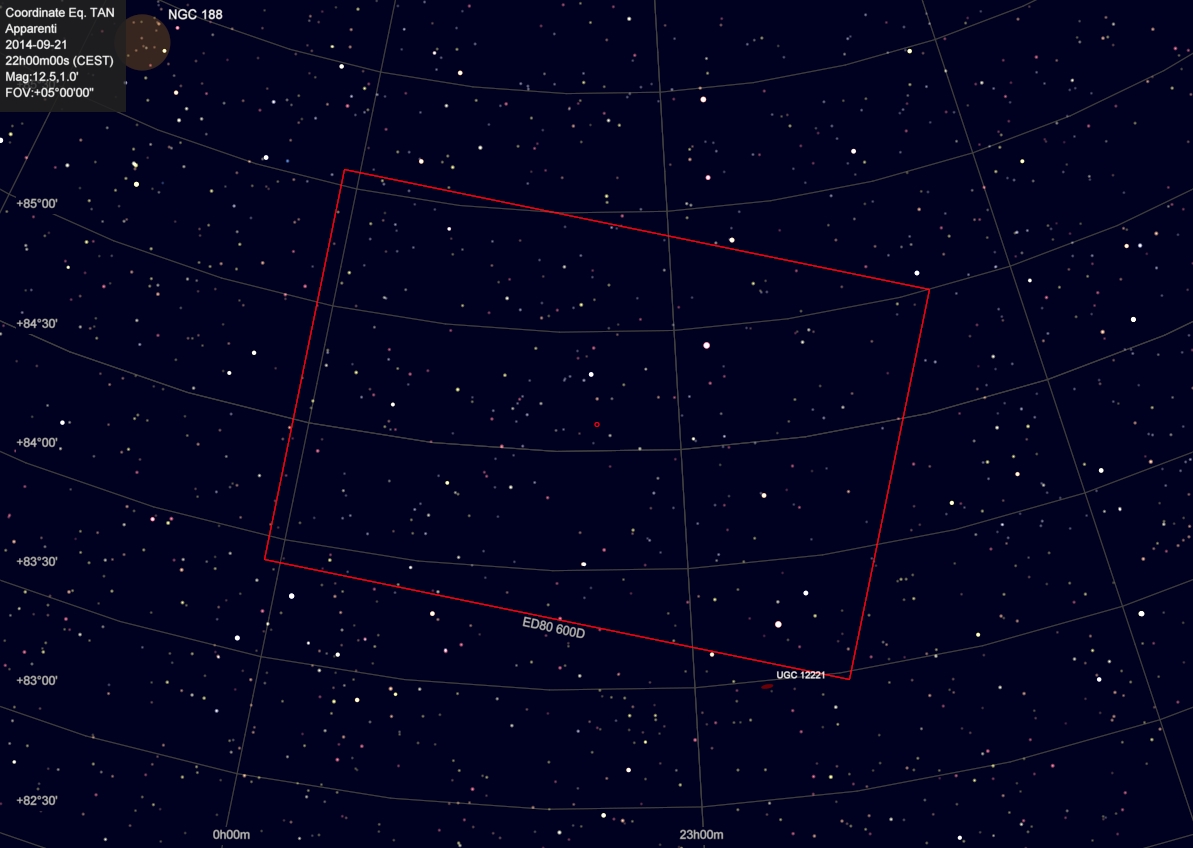
Here an example with Use camera rotator checked.
Here an example without Use camera rotator.
And then a simulation of the mosaic, the four frames from a planetary SW and the result after mosaic combination.
Frame 1: RA 00:46:52 DEC 85:33:49 Camera rotation 11,7
Frame 2: RA 23:13:07 DEC 85:33:49 Camera rotation -11,7
Frame 3: RA 00:36:14 DEC 84:16:23 Camera rotation 9
Frame 4: RA 23:23:45 DEC 84:16:23 Camera rotation -9
…and the final result.